Prerequisites
- Node.js 18+
- An LLM provider API key (OpenAI or Anthropic, depending on your adapter choice)
Create Your AgentMark App
Run the interactive setup:The CLI will guide you through the following prompts:
| Prompt | Description |
|---|---|
| Project folder | Where to create your project (default: my-agentmark-app) |
| Language | TypeScript or Python |
| Adapter | Your preferred AI framework (AI SDK, Claude Agent SDK, Mastra, or Pydantic AI) |
| API key | Your OpenAI or Anthropic API key (can be skipped and added later) |
| Deployment mode | Choose AgentMark Cloud to sync with the platform |
| IDE | Optionally configure MCP servers for your editor |
Connect to the Platform
To sync your files with the AgentMark platform: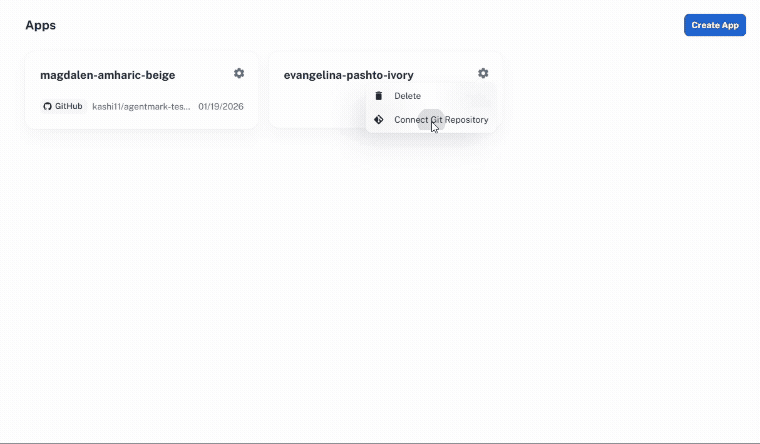
- Commit and push your project to a Git repository
- In the AgentMark platform, navigate to your app
- Add your LLM provider API key (e.g.
OPENAI_API_KEYorANTHROPIC_API_KEY) in Settings > Environment Variables - Connect your repository
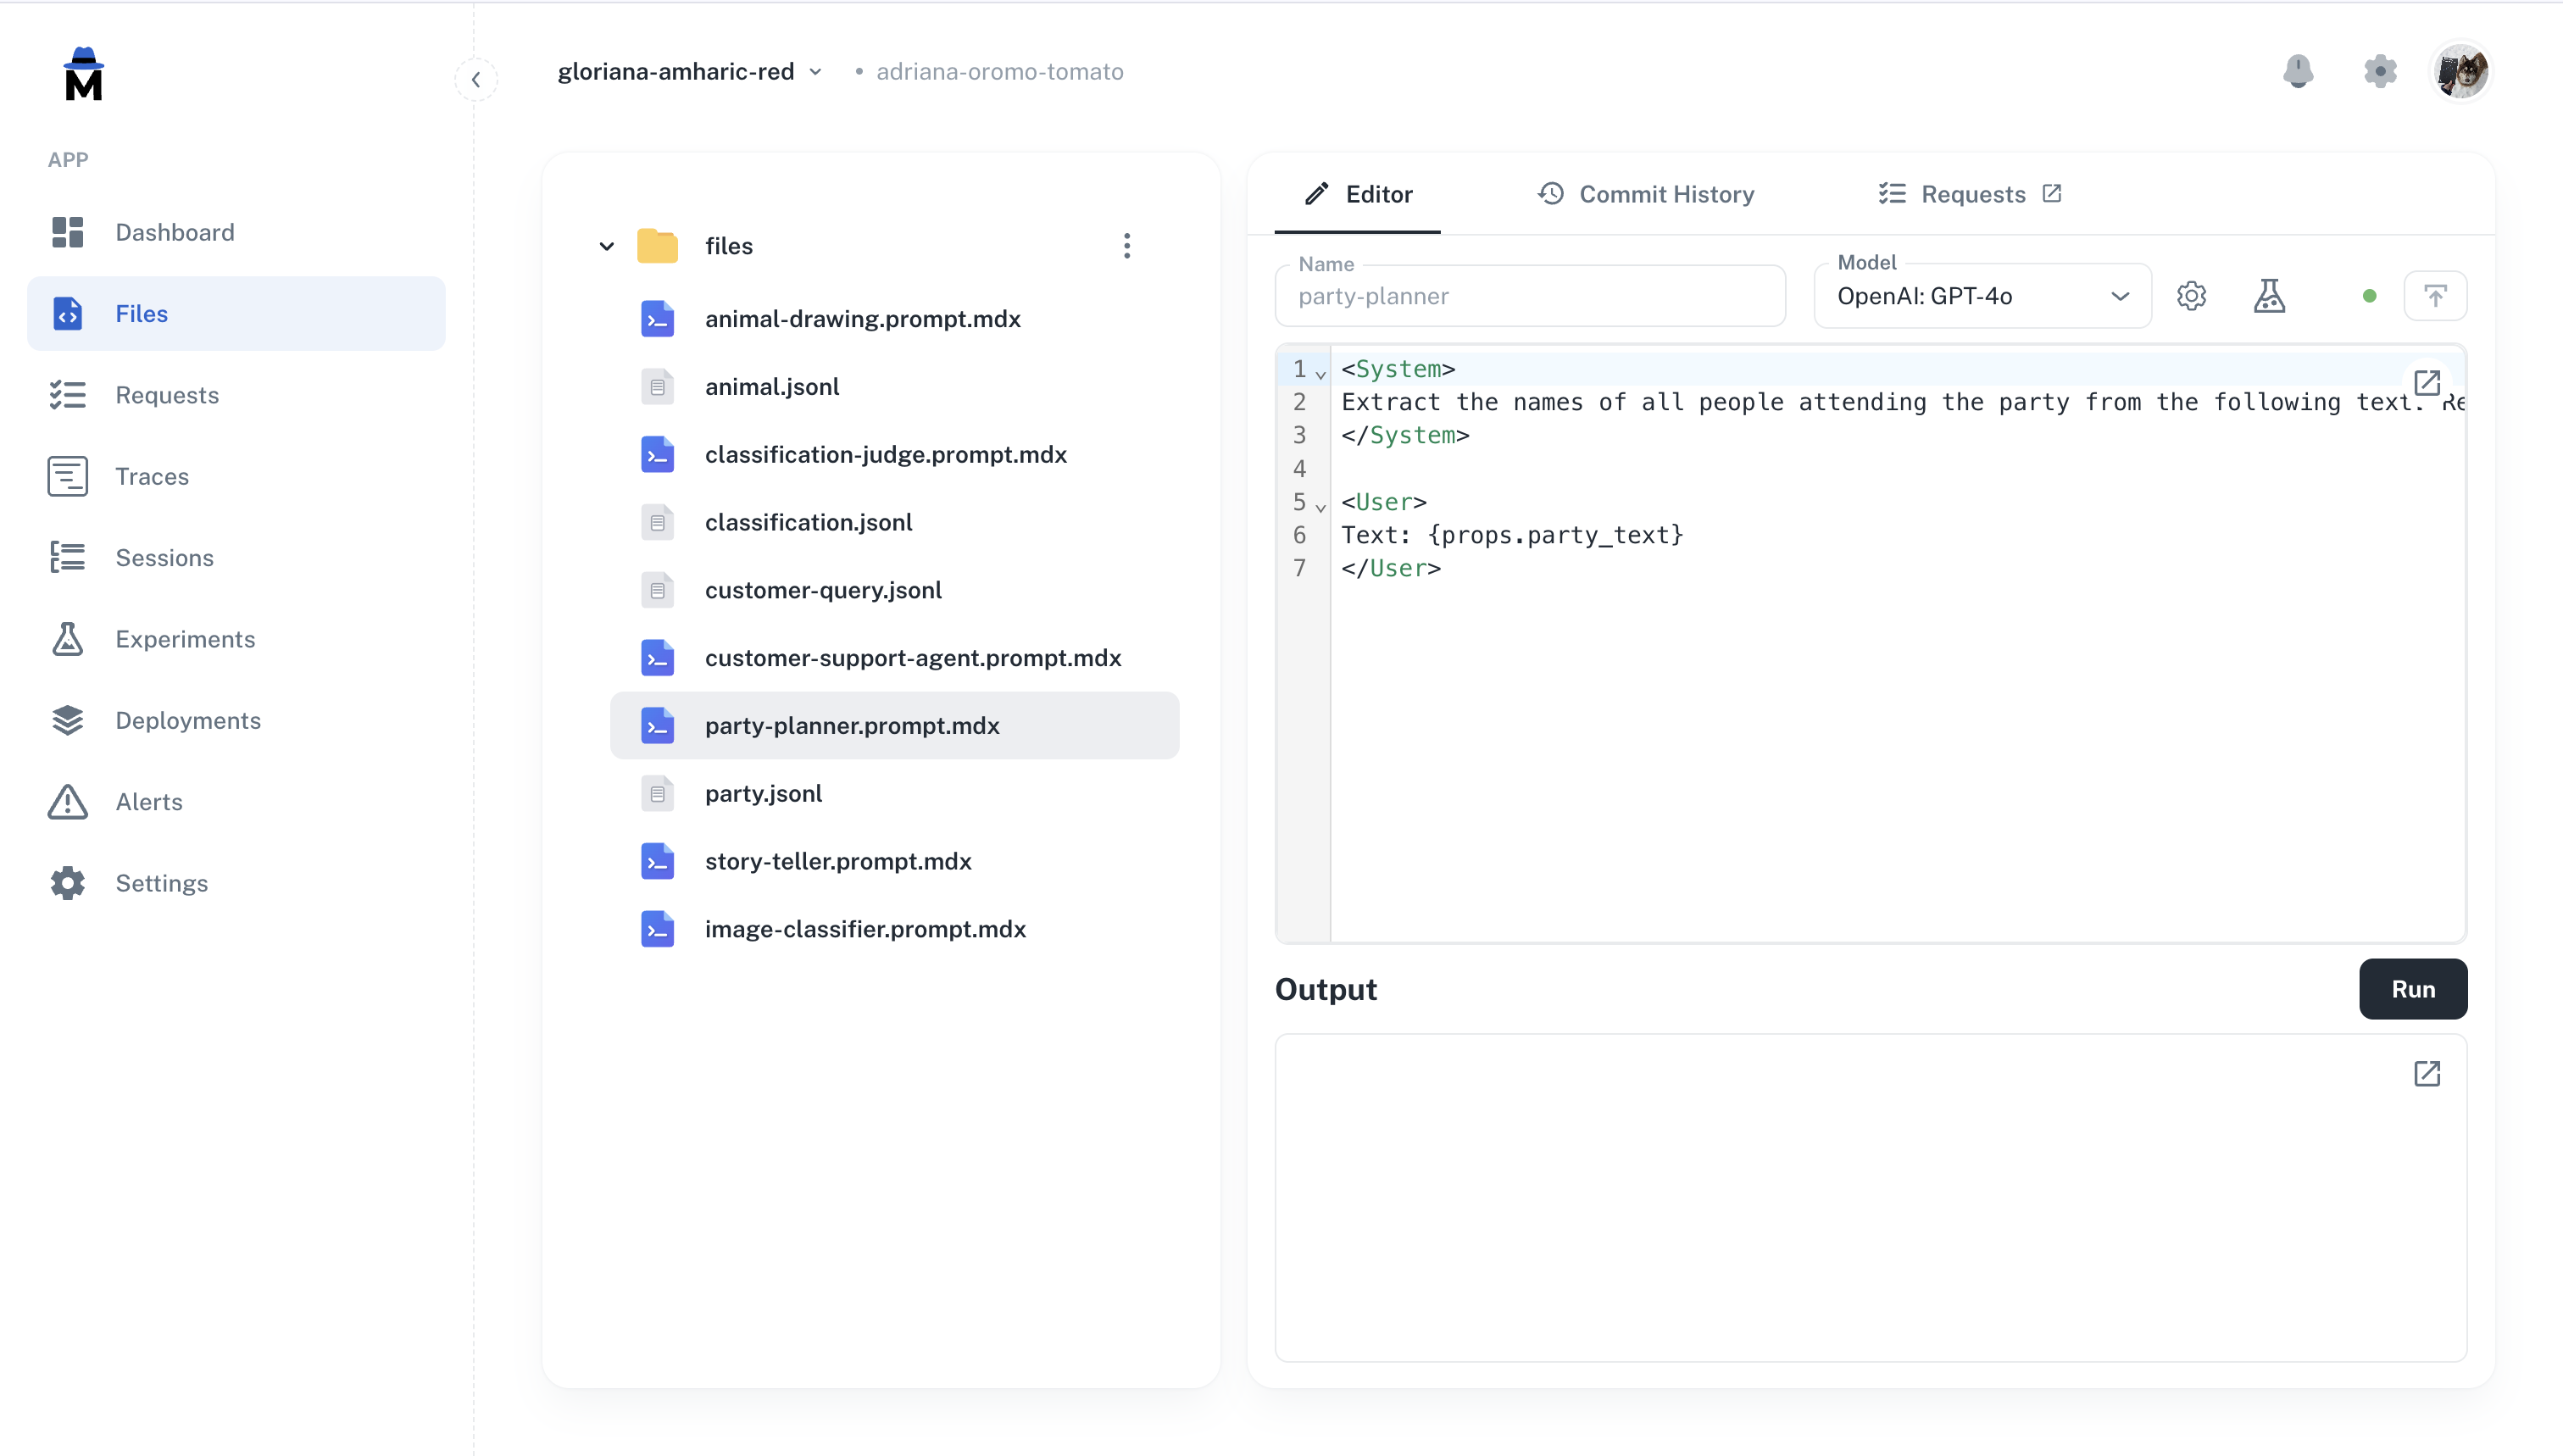
What’s in Your Project
- TypeScript
- Python
| File / Directory | Purpose |
|---|---|
agentmark/ | Prompt templates (.prompt.mdx) and test datasets (.jsonl) |
agentmark.client.ts | Client configuration — models, tools, and loader setup |
agentmark.json | Project configuration (models, evals, schema) |
agentmark.types.ts | Auto-generated TypeScript types for your prompts |
handler.ts | Handler for cloud deployment — executes prompts on the platform |
dev-entry.ts | Development server entry point (customizable) |
index.ts | Example application entry point |
.env | Environment variables (API keys, credentials) |
Available Scripts
| Script | Command | Description |
|---|---|---|
dev | npm run agentmark dev | Start the local development server with dashboard |
prompt | npm run agentmark prompt <file> | Run a single prompt with test props |
experiment | npm run agentmark experiment <file> | Run a prompt against its test dataset |
build | npm run agentmark build | Compile prompts for standalone use |
demo | npm run demo | Run the example application (requires build first) |
IDE Integration
If you selected an IDE during setup, your project includes MCP server configuration that gives your AI assistant access to AgentMark documentation and trace debugging. Supported editors: Claude Code, Cursor, VS Code, ZedNext Steps
Core Concepts
Understand organizations, apps, and branches
Writing Prompts
Learn how to create and configure prompts
Testing & Evals
Test prompts with datasets and evaluations
Observability
Monitor traces, costs, and performance
Have Questions?
We’re here to help! Choose the best way to reach us:
- Join our Discord community for quick answers and discussions
- Email us at hello@agentmark.co for support
- Schedule an Enterprise Demo to learn about our business solutions